Getting started
If you are more of an audiovisual type and want to learn how AwesomeNET works by watching a tutorial video, a four part YouTube tutorial series can be found here. This tutorial covers the requirements, setting up the server and the client as well as the process of integrating AwesomeNET into your own game.
The process of setting up your game and the server consist of a few steps:
- Setting up your server to work with the server software
- Installing the AwesomeNET server software on your server
- Downloading the AwesomeNET client and adding it to your game
- Integrating the AwesomeNET into your game where network connectability is nessecary
1. Setting up your server
The AwesomeNET server can run on eighter Linux, macOS or Windows. You don't need a powerfull dedicated server for AwesomeNET as all the games logic is still calculated in the game client. The server just handles the matchmaking and relays game commands to the clients in a game session.
Installing .net Core
To run the binary version of the server you just need to install the .net Core runtime. See Microsofts download page to see how to install the right version of .net Core.
Forwarding the matchmaking and gameserver ports to your server
AwesomeNETs communitcates via TCP. If your server isn't directly reachable by a global IP (Usually the case if you running the server from a computer and not a dedicated server) you need to forward all the ports AwesomeNET uses for communication to your server. This is the point where you need to decide on which ports you want to use. By default AwesomeNET uses the port 14789 for matchmaking and a range of ports starting at 1500 for gameservers. Please note that each individual gameserver needs it's own port which limits the ammount of simmultaneous running games to the ammount of gameserver prots you've forwarded to your server.
Please note, that for security reasons, you shouldn't open more ports than you actually need. Also make sure you don't use ports that are used for other common applications as your players might not be able to connect to the server if they are using another application that communicates via this port. See this list of commonly used ports for reference.
If you have decided on the ports you want to use you need to forward all communication on this port to your computers/servers local IP. This is done in your routers configuration. To see how to access this follow this guide.
If you are behind a corporate firewall or if you are using a local firewall on your computer/server you also need to allow communication of the AwesomeNET server or it's ports.
2. Downloading and running the AwesomeNET server software
Download
Linux
Open a terminal and navigate to the location you want the server software to be stored e.g. cd /opt/
wget -O AwesomeNETServer.zip https://awesomenet.xeet.sh/download/linux-x64_LATEST.php && unzip AwesomeNETServer.zip && cd AwesomeNETServer
Windows
Open a powershell and navigate to the location you want the server software to be stored e.g. cd ~\Desktop\
iwr https://awesomenet.xeet.sh/download/win10-x64_LATEST.php -OutFile AwesomeNETServer.zip; Expand-Archive -path AwesomeNETServer.zip .\; cd AwesomeNETServer
macOS
Open a terminal and navigate to the location you want the server software to be stored e.g. cd ~/Desktop/
curl https://awesomenet.xeet.sh/download/osx_10_14-x64_LATEST.php -o AwesomeNETServer.zip && unzip AwesomeNETServer.zip && cd AwesomeNETServer
Running the server
To run the server just replace the [brackets] with the configuration you want to use. If you unsure use the following example configuration:
| argument | example |
|---|---|
| host | Your global IP adress (What is your IP?) |
| matchmaking_port | 14789 |
| first_gameserver_port | 15000 |
| max_games | 10 |
The host needs to be eighter the global IP or an global resolvable hostname of your server as this is the host that gets reported to the clients to connect to if they are joining a game.
Linux
./AwesomeNETServer [host] [matchmaking_port] [first_gameserver_port] [max_games]
Windows
.\AwesomeNETServer [host] [matchmaking_port] [first_gameserver_port] [max_games]
macOS
./AwesomeNETServer.exe [host] [matchmaking_port] [first_gameserver_port] [max_games]
Run from Source (optional) (coming soon)
If you want to run the Server from source clone the GitLab repository:
git clone https://gitlab.com/xeetsh/awesomenetserver.git
and run the server like this:
dotnet run [host] [matchmaking_port] [first_gameserver_port] [max_games]
You now have a running AwesomeNET client accepting connections! Amazing!
3. Adding the AwesomeNET client to your game
Download AwesomeNET from the Unity Asset Store.
To get the current version of AwesomeNET please buy a copy of AwesomeNET at the Unity Asset Store. And add it to your game. The packgage consists of all the code needed to run your game in multiplayer mode with AwesomeNET, a GUI you can use to enable your players to establish connections as well as a demo game. All of AwesomeNETs code is open for you to learn from and edit to your requirements.
Please note that I do encurage you to edit the code to fit your needs, however, I can only give you support for unmodified versions of AwesomeNET. As AwesomeNET is actively worked on think about submitting a feature request instead. This way you also make sure you can upgrade your version easily to receive the latest feature updates.
4. Integrating AwesomeNET into your game
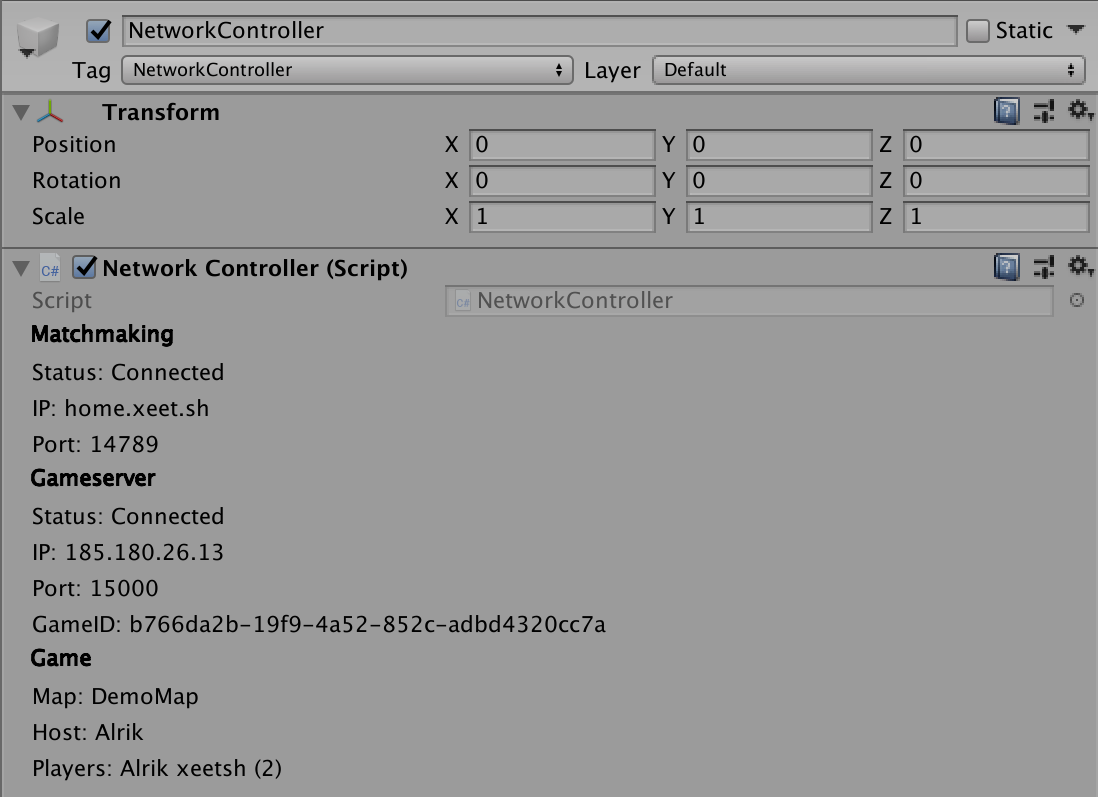
All networking features are managed by the network controller. This script needs to be present in a game object tagged "NetworkController" in the scene in which you connect to matchmaking and from which game scenes are loaded. Most of the time this is the intro/menu scene. There is no need in adding the network controller to any other scene as it will not be destroyed if another scene is loaded. It will be and needs to be active on every scene. A prefab of the preconfigured network controller game object is located in the "Prefabs" folder of the Asset Store packgage.
From here on there are two ways you can go:
OPTION 1 Using the supplied GUI to connect to matchmaking, create, search and join Games
The Asset Store packgage contains a basic GUI for you to start with. It enables the player to use all basic matchmaking functionallity like connecting to the matchmaking server, searching for running games, creating new games and starting offline games. The GUI prefab is located in the "Prefabs" folder.

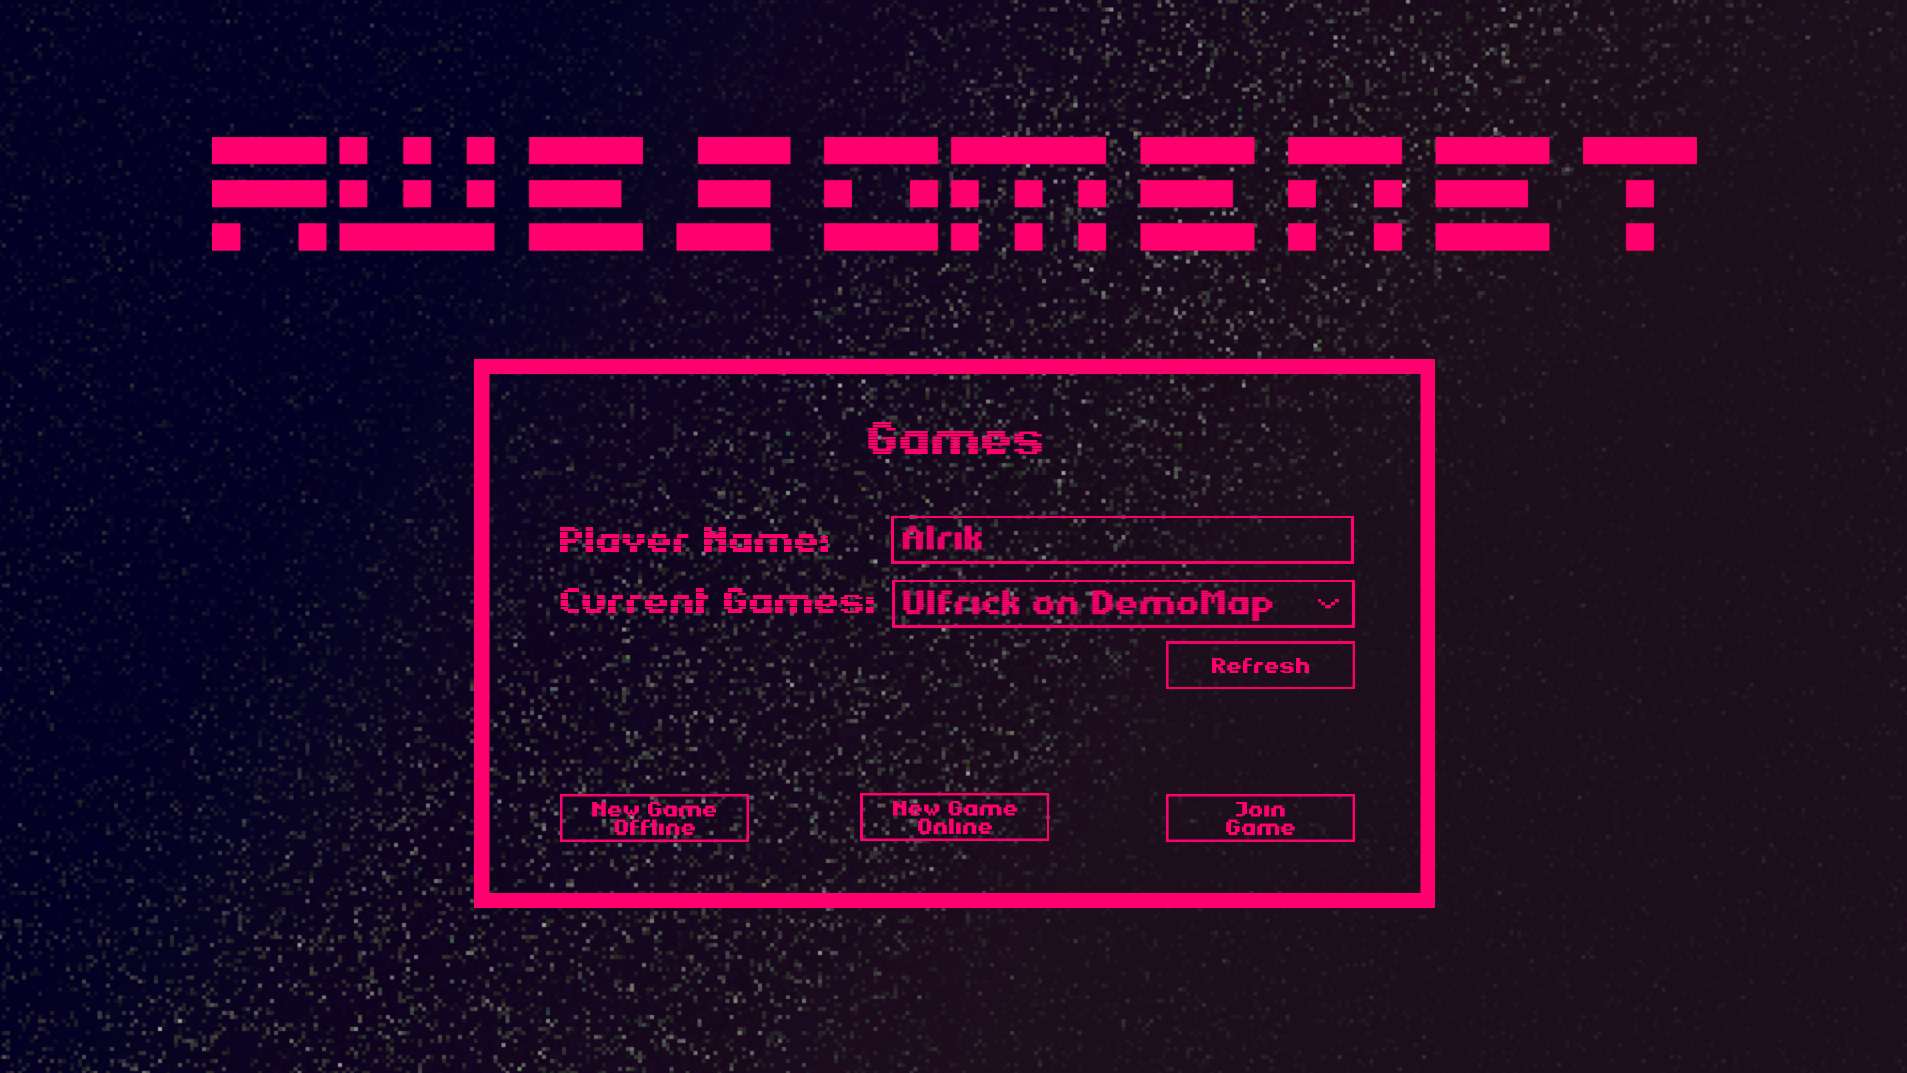
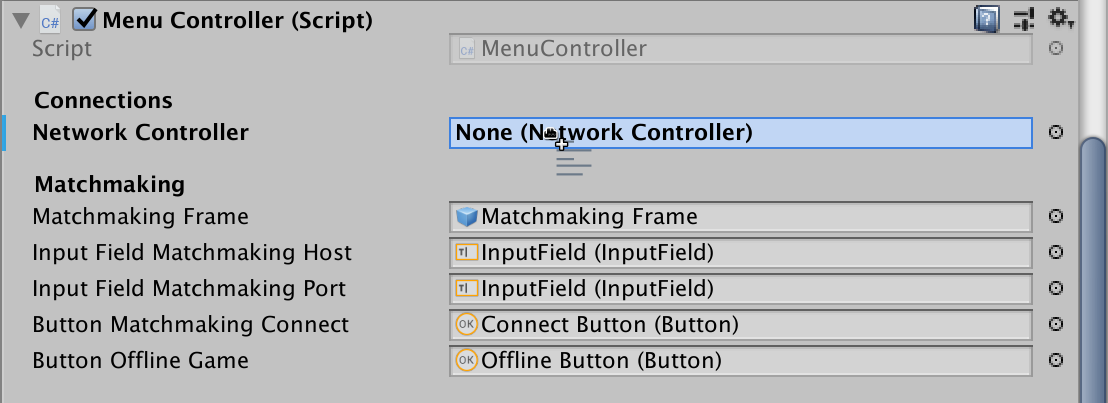
After dragging the Prefab to your scene you just need to tell the GUI which network controller it needs to use. To do this drag your network controller in the "Network Controller" field of the menu controller located in your GUI object.
Feel free to customise this GUI in any way you like!
Please note, that by default the GUI is only able to advertise and join games on a single map called "DemoMap" to advertise games on different maps you need to add some sort of map selection machanism to the GUI. If your game consists of only one map change every occurance of SceneManager.LoadScene("DemoMap"); in the MenuController to the scene you want to load.
OPTION 2 Manually connect to matchmaking e.g. with your own GUI
See Matchmaking Functionallity.
Conclusion
Congratulations! By now AwesomeNET is fully integrated into your game and you can start adding network functionallity to any game objects within a few clicks. To see how this is done check out Adding network functionallity to GameObjects